Multi Image Widgets Panel
Opens automatically when any widget composed of multiple images is selected, including any that have just been drawn. The panel can also be opened or closed using a tool in the Home ribbon.
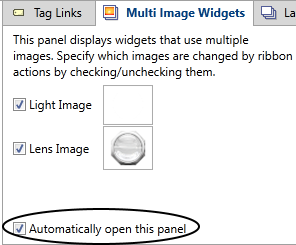
The automatic-open feature can be disabled using a check box at the bottom of the panel.
When widgets containing component images are selected for editing, both the Widget ribbon and the Image ribbon are enabled. You can change the image used by the widget, and change all of the formatting characteristics of that image.
If the widget has multiple images, as is the case with the toggle switch, indicator lights, selectors and others, then you can choose which of the component images should be affected by certain formatting changes.
Changes from the Adjust section of the formatting ribbon will apply to the selected component images. Changes from the Display section apply to the overall widget. For example, note that the Display section has a Rotation command, which will be applied to the full widget, while the Adjust section has an Image Rotation command, which will apply only to the selected component images.
All selected images will be added to the list, with their component images separated by relevant action or state.
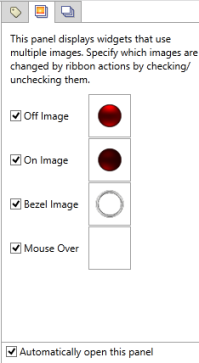
A typical view of the panel
with one selected widget.
This feature gives you a fine level of control over image editing within widgets, and is also useful for making global updates to widgets. For example, you might need to change a large number of pump widgets from the old model to a new version. You can also use this feature to update a set of Image Change widgets to use a new color scheme for each state. (The states of an Image Change cannot be linked to a Style Settings tag, therefore the color selection for each state must be set directly.)
Use the Multi-Image Widget palette:
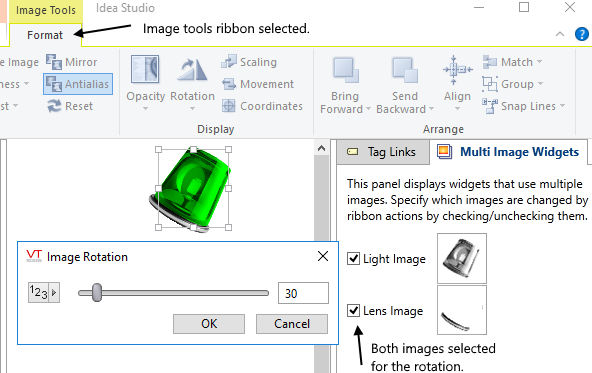
Rotating both images in a widget.
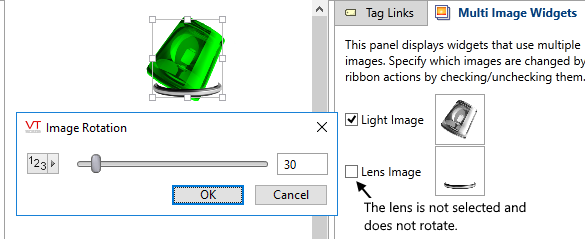
Editing only one image of a multi-image widget
Your choice.
The auto-open behavior of the Multi-Image Widgets panel is under your control. You will find the option to disable it at the bottom of that panel.
