
By default there will be no tags available in the agent MIB, only basic service variables. Tag setup requires a manual action to initiate. In particular, the property, SNMPAgentEnable must be set to 1 before proceeding.
- Open the Idea Studio.
- Within the Widgets palette, open the Tools folder.
- Open the SNMP Agent Tools folder
- Add the 'SNMP Agent' button to your page.
The SNMP Agent button has only one configurable property: the name to display on the button.

- Close the Idea Studio.
Running the SNMP Agent:
- Click the SNMP button.
The SNMP Agent Setup dialog will open.
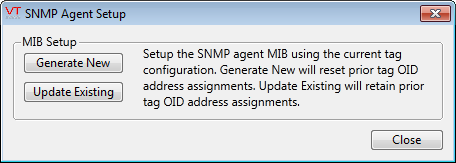
There are two options: Generate New and Update Existing.
- Generate New will reset prior OID address assignments
- Update Existing will retain prior OID address assignments
(Either way the SNMP Agent will be updated to the current VTScada tag configuration)
Select the desired option and then choose a location in which to save the exported MIB file.
Only OPC-enabled tags can be made available via the SNMP Agent. The update process automatically includes all OPC-enabled tags running in the application.
- OID addresses are assigned to tags and are retained until explicitly reset.
- Every available tag will have the following fields: { Name, Value, Quality, Timestamp, Type }
- SNMP data type and access level for Value are determined via the OPCGetTagAttributes() API.
- A subset of the values from OPCGetTagProperties() populate the optional fields: { Description, Area, Units, Device, Address }
- SNMP Get commands use the OPCReadTagValue() API to access the Value, Quality, and Timestamp.
- SNMP Set commands use the OPCWriteTagValue() API to set the Value.
See the OPC setup guide for OPC API function implementation.
subsequent tag configuration changes will not be included until the next time MIB Setup is executed.
