Create a Help Widget
With a user-defined widget, a parameterized page, and a short expression, you place a "Help" button anywhere that is helpful to display instructions or other information that you store in any tag.
This advanced tutorial topic assumes that you are already know how to create Parameterized Pages and how to Create Widgets. If not, you are advised to learn to use those features before proceeding. This advanced tutorial skips steps that someone familiar with those technologies would know.
Elements:
Tags
You will use the Help Key field of your tags to store the instructions. This is a non-standard use of the property and therefore somewhat at risk of breaking should Trihedral change the definition of that property in a future release. However, due to the fact that this property is widely employed for non-standard use, that risk is remote.
User-defined widget
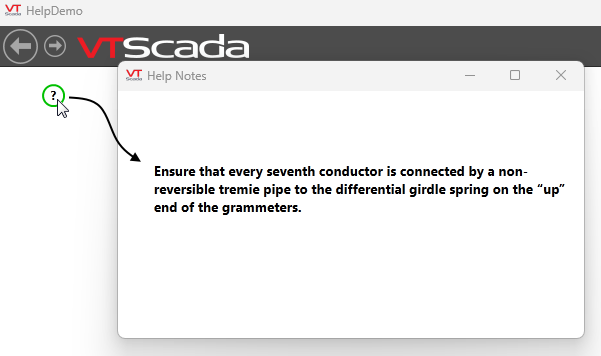
In the preceding example, the visible portion of this is simply a circle and a question mark. The widget is defined as a "Tag Widget" and configured such that it can be linked to a wide selection of tag types.
Within the widget is a page hotbox that uses an expression to pass contents of the linked tag's HelpKey field to a parameterized page.
Parameterized page
This is a pop-up page containing a Multi-Line Text widget. The widget is configured to display whatever is passed to the page via its parameter.
For visual clarity, the widget in the preceding example uses the Analog Font.
Steps:
A) Create the Parameterized Page
- Use the Idea Studio to create a new pop-up page.
- Give the page a descriptive name and title such as "Help Notes".
- Do NOT add it to the menu system.
- Add a parameter to the page.
- Give the parameter a name such as "TagWithHelp".
- Set the parameter type to Tag.
- Select all the tag types that you might want to use with this system. (You can edit the parameter later to add more.)
- Add a Multi-Line Text widget to the page. (Important - do not use any text or widget other than the Multi-Line Text.)
- Size the widget to accommodate any message that you might want to display.
- Select a font that is relatively easy to read. (You might create your own.)
- In the Home ribbon of the Idea Studio, click the Source Code tool to open the page in a text editor.
- [Important] Close the Idea Studio before making any changes to the page using the text editor.
- Within the text editor, look for the line that begins, Scope(\Code, "Library", TRUE)\DrawMultiText(
- Modify this line as follows. The example shows only a portion of the line, emphasizing what to modify in bold text. Do not delete code that follows this portion of the example.
Scope(\Code, "Library", TRUE)\DrawMultiText(TagWithHelp\HelpKey, 0, 0,
- Save the text file.
- In the VAM, use the Import File Changes button for your application.
B) Create the Help Widget
- Working in the Idea Studio, use the File menu to create a new Tag Widget.
- Select all the tag types that you might want to use with this system. The selection set should match that of the parameter you created earlier.
- Give the widget a name such as "Help Reference".
- Deselect the "Include..." options.
- In the upper left corner of the widget, draw whatever shape you want to use to represent "click here for help". The example at the top of this topic used a circle with diameter 20 pixels and a question mark.
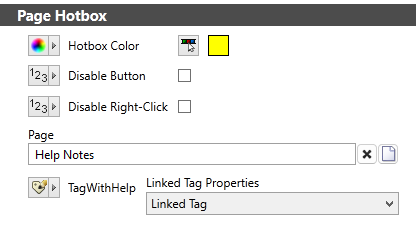
- Overlay the symbol with a Page Hotbox widget.
- In the Page Hotbox widget, select the "Help Notes" page.
- Configure the parameter to use Linked Tag as shown:
- Save your work.
Put it All Together
- Open the properties dialog of a tag (choose a type that was included in the lists earlier).
- Type a message in the Help Key parameter, then close the dialogs.
- Draw your new widget on a page, then link it to the tag you just modified.
- Close the Idea Studio, then click on your widget. A window should pop open, containing the message you put in to the tag's Help Key field.
- Refine the appearance of the page and widgets to suit.
