Add New Applications
Create applications and add them to the VAM using the Add Application tool, found in the triple-bar menu at the top left of the VAM window as "Add New Application". Use this tool either to create a new application or load an existing one.
Starting the Add Application Wizard
The Add Application wizard will open automatically as part of the VTScada installation process.
- Creates a standard application, with all the default VTScada features.
- You can name the application whatever you want.
- Unless you know that you have an OEM layer1 to use, select this option.
- Can also create a standard application, but with the option of choosing an OEM layer(*) and naming an alternate folder.
- Create a script application. (For VTScada programmers only.)
- Load or clone an application from ChangeSet.
- Load an existing application into the VAM list.
- Copy an application from another workstation.
You can remove an application from the VAM without also deleting it from the computer. Select the application name, then click the Remove tool. You will be prompted for whether you want to delete or retain the files.
(Advanced option #1 of the Add Application dialog)
After opening the Add Application Wizard, choosing Advanced, then Create new, you will arrive at the Create new page.
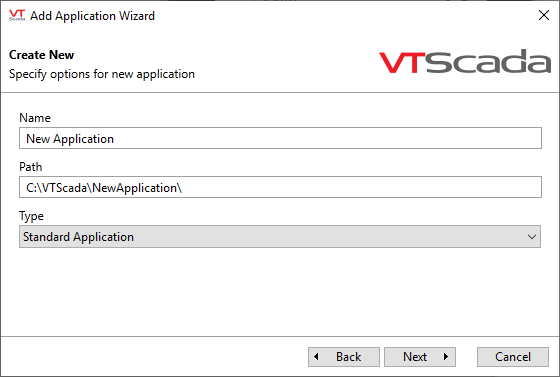
Create new - advanced option
- A default name, "New Application" is provided, but you are advised to replace this with a more relevant name.
- The path will include the VTScada installation folder and the name of the application, with spaces and other symbols removed. You may choose or create a different path, but it is seldom useful to do so.
- The Type selects the OEM layer that the new application will be built upon. OEM layers are most often used to provide industry-specific features.
The Next button will take you to a confirmation screen where you can review your choices before clicking Finish to create the application.
(Advanced option #2 of the Add Application dialog)
After opening the Add Application Wizard, choosing Advanced, then Find existing, you will arrive at the Find existing page.
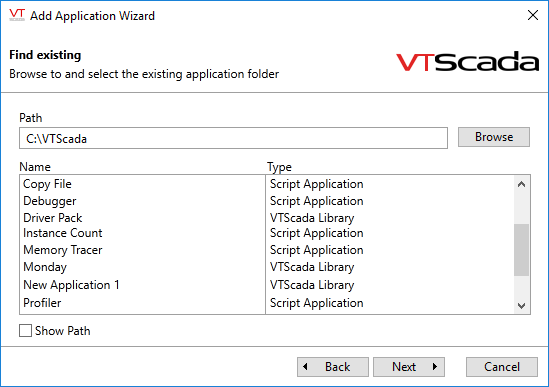
Find existing
Use this if you have an application on your workstation that you wish to add to the list in the VTScada Application Manager (VAM).
For example, a developer or customer may have given you an application on CD or memory stick. After copying the folders to your computer, use these steps to see and run the application in VTScada. You must also use these steps to view and run utility programs that come with VTScada. (These utilities exist to help VTScada programmers optimize their code. Only a few are useful for ordinary application development work.)
- Browse to the path containing the application's folder.
The Show Path option is useful for cases where the path name does not match the application name. - Select the application to load.
- Click Next.
A confirmation page opens, where you can review your choices before clicking Finish.
- The folder exists, and contains an application, but the Found Applications dialog will not display it.
The application is already listed in the VAM, and cannot be added a second time. If you are attempting to make a copy, create a ChangeSet of the existing application and then create a cloned application using that.
- The type is a string of random letters and numbers instead of an application name.
The application is based on an OEM layer that is not available. Install the OEM layer application first, then the one you want to run. You may need to go back to whoever supplied your application to ask for the OEM layer application.
(Advanced option #3 of the Add Application dialog)
The preferred way to copy a stand-alone application from one computer to another is to package it into a ChangeSet![]() An application's development history, packaged into a single file for distribution. There are several types of ChangeSet file. file. (ChangeSets - An Application in One FileChangeSets for Distribution)
An application's development history, packaged into a single file for distribution. There are several types of ChangeSet file. file. (ChangeSets - An Application in One FileChangeSets for Distribution)
Applications that will run on multiple servers are best distributed using the Get From Workstation option.
After opening the Add Application Wizard, choosing Advanced, then Get from ChangeSet, you will arrive at the Get from ChangeSet page.
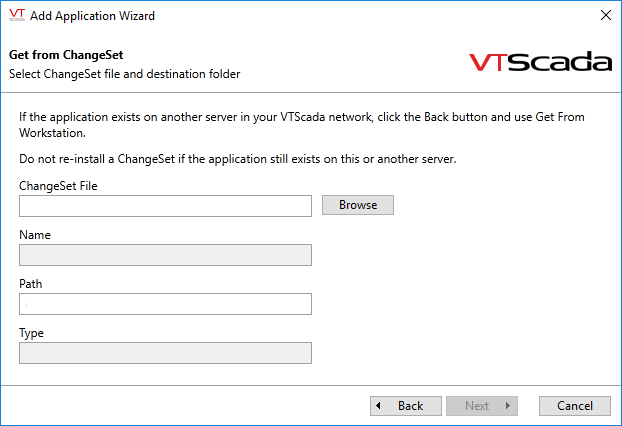
Get from ChangeSet
- Use the Browse button to locate the ChangeSet file.
- Optionally, change the path (folder), into which the application will be placed.
- Click Next.
A confirmation page will open, where you may review your choices before clicking Finish.
The Name and Type cannot be changed in this screen. You may change the name later using the Application Configuration dialog. The type is the OEM layer that this application depends upon, and cannot be changed at any time.
The OEM layer (Type) must exist and be added to the VAM before this application can run.
- A "1" or other number is added after the name or path.
The application already exists on your computer. You may choose to create a copy (clone) if you wish. The "1" distinguishes the clone from the original.
- If the "Type" field refers to an application that does not exist on this computer, you must add that application before this one will run. Ensure that whoever gave you the ChangeSet file also provides a ChangeSet of the underlying type.
- If the application in the ChangeSet file had a server list configured, and those servers cannot be accessed from your workstation, you must remove the server list before starting the application.
- If security was enabled in the application, ensure that you have a valid account name and password before running the application.
(Advanced option #4 of the Add Application dialog)
A cloned application, created using a ChangeSet
The revision history (repository) will be included from a standard ChangeSet, but not from a snap shot ChangeSet.
By working in a cloned application, you can test, debug and experiment, all without risk of changing the original application.
After opening the Add Application Wizard, choosing Advanced, then Clone from ChangeSet, you will arrive at the Clone from ChangeSet page.
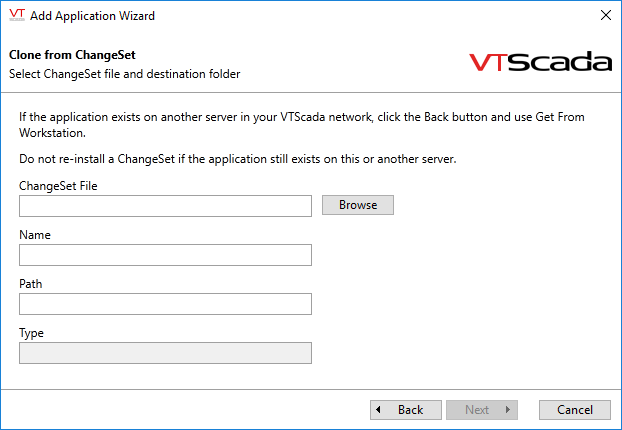
Clone from ChangeSet
- Use the Browse button to locate the ChangeSet file.
- Optionally, change the name and the path (folder), into which the application will be placed.
- Click Next.
A confirmation page will open, where you may review your choices before clicking Finish.
The type is the OEM layer that this application depends upon, and cannot be changed at any time.
The OEM layer (Type) must exist and be added to the VAM before this application can run.
- If the "Type" field referred to an application that does not exist on this computer, you must add that application before this one will run. Ensure that whoever gave you the ChangeSet file also provides a ChangeSet of the underlying type.
- If the application in the ChangeSet file had a server list configured, and those servers cannot be accessed from your workstation, you must remove the server list before starting the application.
- If security was enabled in the application, ensure that you have been given a valid account name and password from the original application before starting this instance.
(Advanced option #5 of the Add Application dialog)
If you have VTScada licenses for two or more computers, and at least one license includes server capabilities, then use this option to install the application on the other computers on your network.
The Get from workstation option is preferred for distributing an application between computers that are connected on a network. By using this method, you ensure that the most up-to-date version of the application is installed, and that future updates are distributed automatically. (Assuming a properly configured server list.)
If the application is based on an OEM layer, and that OEM layer is present on the server, it will also be retrieved at the same time as the application.
If the application is secured, you must sign in with an account that has either the Configure or Manager privilege, and that is not a member of any security group.
- Begin by opening the Add Application Wizard,
... choose Advanced and click Next,
... choose Get from Workstation and click Next.
You will arrive at the Get from Workstation page.
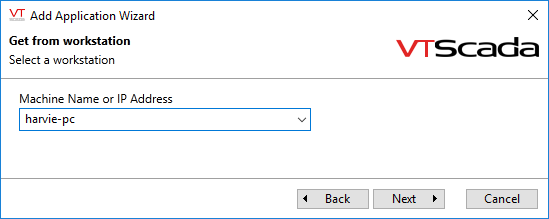
Machine names are preferred over IP Addresses.
Type the name if the list is not populated automatically.
- Enter the machine name or IP address of the workstation containing the application.
On a network with a properly configured domain name server, all local machines that have VTScada installed should be available for selection in the drop-down list. - Click Next.
Applications available on the selected workstation are shown. An asterisk will mark ones that already exist on your workstation.
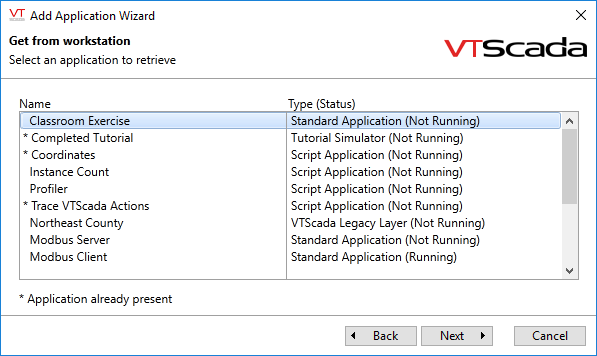
Typical list of applications.
- Select the application you want.
- Click Next.
A confirmation page opens, where you may review your choices before clicking Finish.
If the application is secured, you must logon before the transfer will take place. Get From Workstation operations are exempt from TOTP. You will not need to perform a TOTP check even if there is a device registered to the account.
After clicking Finish, the application is copied to your workstation and added to your list of available applications in the VAM.
When adding a backup server, you can monitor VTScada's progress while copying data to the new server by using the Historian Status widget. When the status returns to "Ready", your data is synchronized.
- No servers are shown in the Choose Server dialog.
This may indicate that your network domain name server (DNS) is not properly configured.
In most cases, you can ignore this problem and type in the name of the computer where the VTScada configuration server is running.
It may be necessary to add the Setup.INI property, RPCConnectStrategy, and set it to a valid value.
- The Find Servers dialog reports that the requested computer is unavailable. This may be preceded by a "Contacting Workstation..." message.
The specified workstation is not available, or VTScada is not running on that computer.
- The application you expected to find is not listed.
Applications that exist on both computers are not shown. If it is not listed in your VAM, try the Find Existing option.
