Certificate Management UI
Several tabs in the OPC UA Client Driver configuration possess a Certificate Droplist, a Certificate Summary and a button that opens a 'Manage Certificates' window. It is important that you understand this tool before proceeding with configuration of the client driver. In particular, take time to review the information in the topic Certificate Name Description.
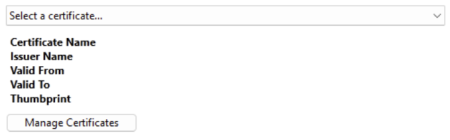
Certificate Droplist and Summary
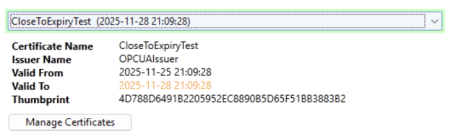
When a certificate is required for data exchange authentication, it is accessible through the Certificate Droplist. When a certificate is selected it will populate the Certificate Summary section with the certificate's name, issuer, the start of its validity window, the end of its validity window (the certificate's expiry date) and its thumbprint.
If two or more certificates possess the same name, only the certificate with the furthest expiry date will be accessible in the Droplist. If a certificate that expires sooner is required, select the 'Manage Certificates' button and delete the certificate or certificates that expire later than it does.
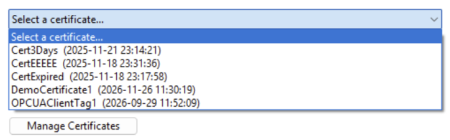
Selecting the 'Select a certificate...' field will reveal a list of available certificates from a store as determined by your application's Client / Server Configuration.
When a certificate is selected, its relevant data will populate the Certificate Summary section.
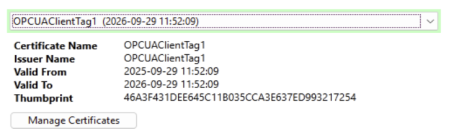
A selected certificate with an expiry date of more than 30 days from the present.
A selected certificate's expiry date will appear in orange text if it is less than 30 days away from the present.
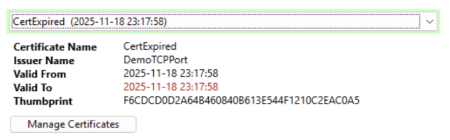
A selected certificate's expiry date will appear in red text if it has expired.
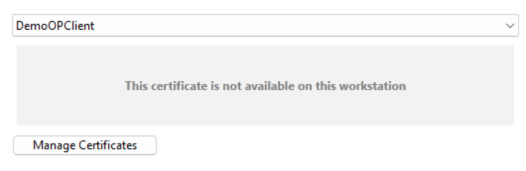
This message is displayed beneath the Certificate Droplist instead of the certificate details if the certificate is deleted or otherwise unavailable within the user's system. Only the name of the ticket will remain if it was selected at the time of its deletion, if another certificate is selected it will be removed from the Droplist.
If you cannot find the certificate you need, you may select the 'Manage Certificates' button and view the available certificates within the Certificate Grid.
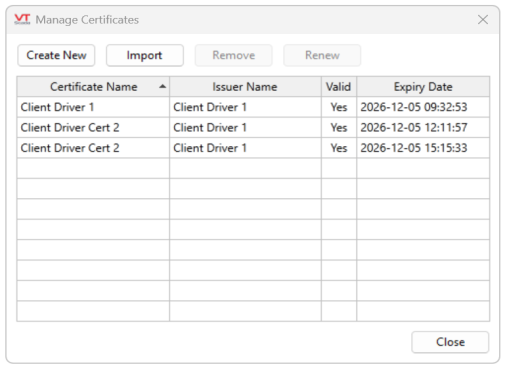
The principal feature of the 'Manage Certificates' window, the Certificate Grid displays the collection of certificates in a certificate store (which store depends on which grid is displayed) and a set of action buttons.
Grid Columns
Certificate Name
The leftmost grid column shows the "Friendly Name" of the certificate, if it has one, and the "Common Name" of the certificate if it does not. Details follow in Certificate Name Description.
Issuer Name
Shows the issuer of the certificate. Self-signed certificates often have the same name as the certificate Common Name, while certificates issued by a Certificate Authority (whether in-house or external) bear the issuer’s name.
Valid
Indicates whether the certificate is valid for the purpose intended. This means slightly different things on different grids.
On the 'Connection' tab or 'Client Certificate' tab (on the OPC UA Client Driver for example), a certificate is considered valid if it still within its validity period. Certificates in the same certificate store that are inappropriate for use are not displayed. Although a certificate might not be marked as valid, it may still be allowed for use by the server or client.
Note that on the 'Server Certificate' tab, the 'Valid' column means that the certificate is within its validity period and the name on the certificate matches the name of the server supplied on the 'Connection' tab Endpoint URL field. This helps you spot if the server responding to the configured Endpoint URL holds a valid certificate for that server.
Expiry Date
The precise time at which the certificate will no longer be valid. The expiry is avoidable by selecting the certificate from the grid and then 'Renew', opening the 'Renew' window (see 'Renew Button' below).
Control buttons
The 'Create New' button will generate a self-signed certificate and place it in the store being displayed on the certificate grid. Self-signed certificates won't be trusted by other hosts unless the certificate is manually "trusted", which is typically done using the UA server configuration tools.
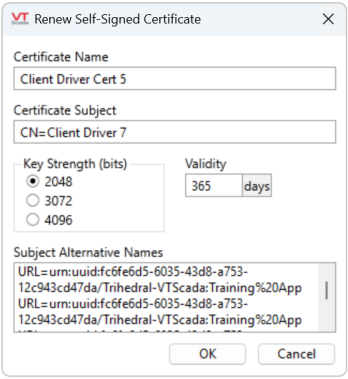
Click this button to display the following dialog, the content of which will be incorporated in the new certificate.
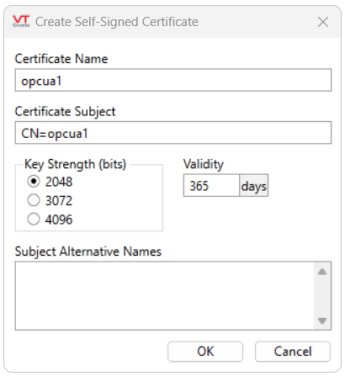
The certificate name is the "Friendly Name" of the certificate. After a certificate is created, the Common Name (CN) cannot be changed, but the Friendly Name can using the Microsoft Management Console (MMC) or by renewing the certificate.
The Friendly Name is what the OPC UA Client Driver holds as a parameter to its tag and is propagated across computers participating in the distributed application.
Previously, if the 'ClientCertificateName' parameter had a value it was not possible to create a new client transport certificate with a different name. Now (12.1.53+), even if the 'ClientCertificateName' parameter has a value, you can create a new client transport certificate with a new name.
Consider the case of a pair of I/O servers (primary and backup). Normally, the primary will connect to the OPC UA server and retrieve data. To do this (assuming the driver is not running in unsecured mode) it needs to provide a Client Certificate to the server. It uses its 'ClientCertificateName' tag parameter to find the certificate it should supply. As the backup I/O server contains an exact copy of the tag, it too has the same tag parameter and will therefore look for a certificate of that name in its certificate store.
There is no issue if you install the same certificate (and private key) on both I/O servers. However, you can use different certificates so long as they have the same 'Friendly Name', as this is the key used by the OPC UA Client to locate its transport certificate. If using secure communication to the OPC UA server, the server must trust both client certificates. This normally requires a manual intervention at your OPC UA server.
You will also have to trust the server certificate on the VTScada client / backup server. See OPC UA Client Driver properties Server Certificate tab in this topic.
You must create/update certificates with the same names on all backup machines. If you modify ClientCertificateName on your primary you must also ensure that your backup machines have a matching certificate.
Certificate Subject
The certificate subject should be modified. It is the Distinguished Name of the certificate and defaults to "CN=<driver name>", setting the Common Name to the name of the driver tag.
It is advisable to change the certificate subject to the fully qualified domain name (FQDN) of the local machine, to make certificate identification on your OPC UA server easier. If you use the same certificate for you backup machines then choose a meaningful subject name to allow you to identify the certificate on your OPC UA server.
Key Strength
This allows you to set the key strength (number of bits) in the asymmetric key pair that will be generated for this certificate. Currently, the dialog only permits RSA keys (that is all the current OPC UA servers support) of key strengths between 2048 and 4096 bits.
The client and server certificates can have different key strengths.
VTScada will only generate RSA public/private key pairs that are classed as acceptable by:
https://nvlpubs.nist.gov/nistpubs/SpecialPublications/NIST.SP.800-131Ar2.pdf
This mandates at least "112 bits of security", which means an RSA key length of at least 2048 bits.
Referring to Table 4 within the following document, this is sufficient up to the year 2030.
https://nvlpubs.nist.gov/nistpubs/SpecialPublications/NIST.SP.800-57pt1r4.pdf
Validity
The key validity period can be set to be between 30 and 36500 days (approximately one month to 10 years).
When a certificate expires, any entity receiving that certificate should decline it. A shorter validity period may seem inconvenient, but this reduces the length of time that a compromised or stolen certificate remains undetected.
VTScada will raise an alarm when a certificate is within 30 days of expiry to give you time to install newer certificates.
Subject Alternative Names (SAN)
Supply any DNS (Domain Name Service) names that the client computer may be known by. These will be incorporated into the certificate extended properties' Subject Alternative Name field as entries. Enter each value on a separate line, including prefixes like:
DNS=host.example.com
IP=127.0.0.1
URL=urn:EXAMPLE.trihedral.com:OPCUA:SimulationServer
The certificate will also have an automatically-created URL and a DNS entry. The URL is composed from the application GUID and is unique to this application. The DNS entry contains the host name of the workstation on which you are creating this certificate (not the fully qualified domain name (FQDN)).
Some OPC UA servers may require that one of the DNS names provided can be matched to a white list, this field gives you an opportunity to provide such a DNS name. The FQDN, as provided in the Certificate Subject, should be included.
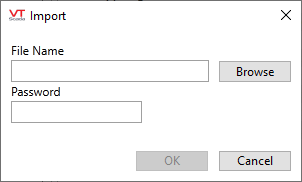
Use to import a certificate and private key from a Personal Information Exchange format file (.PFX or .P12). This file format is commonly used to securely transport certificates and private keys between computers.
The Microsoft Management Console’s Certificate Management snap-in is one way to export certificates and their private key to such files.
On clicking the button, the following dialog is displayed, which allows you to select the file and supply the password associated with the private key (which is encrypted within the file).
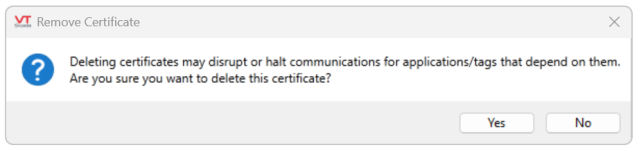
Removes the currently selected certificate (and its private key) from the grid and the associated certificate store.
After removal, a certificate can be restored only if you have a backup of that certificate in a suitable format (e.g. a .PFX or .P12 file). Confirmation is required before the certificate is deleted.
Enabled after selecting a certificate from the grid, this will open a 'Renew Self-Signed Certificate' dialogue. Consistent with the 'Create New' window, this allows you to extend the certificate's validity period and edit its other features.