Protect Pages and Output Tags
With one exception, Control Outputs(*), the general privileges protect only what is built into VTScada, not anything that you create. You must create custom privileges to protect what you build.
(*) The general privilege, Control Outputs, is applied to every tag by default, but is not shown in any tag's Properties dialog. If a tag is not otherwise protected by a custom privilege of your creation, then it is protected by Control Outputs instead (but not both).
These privileges are referred to as "custom privileges" because they are always custom-built for an application. (In earlier versions, they were known as "application privileges")
A custom privilege applied to an output tag will prevent an unauthorized user from operating the associated controls, but still allow them to see the tag. A custom privilege applied to a page will prevent an unauthorized user from opening the page, thereby hiding its contents from view.
As a suggestion, ensure that the start page for your application is one that may be viewed freely when no-one is signed in.
Users with the Administrator privilege can create custom privileges within the Privileges dialog. You can also use this dialog to suppress general privileges so that they cannot be seen in the Accounts dialog, thus preventing anyone (including yourself) from granting that privilege to an account or role while it is suppressed.
You can create hundreds of privileges if necessary. But, before creating large numbers of privileges, you should consider whether rules that limit a privilege by scope or workstation might help you keep the number to a manageable level.
For programmers: Every general privileges has a negative index number starting at -1. User privileges have an positive index number, starting at 16. The index number can be seen in the Privileges dialog, available from the security menu.
See also: System Privilege Reference for Programmers
Add new privileges
To create or change custom privileges:
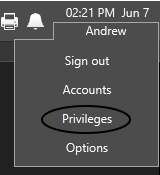
- Sign in to the application using an account that has the Administrator privilege.
- Click your name (formerly labeled "Sign in").
- The Security menu expands.
- Click Privileges to open the Privileges dialog.
- Click the button labeled New Privilege.
A data-editing field opens in the Custom Privileges list, pre-filled with the name "New Privilege".
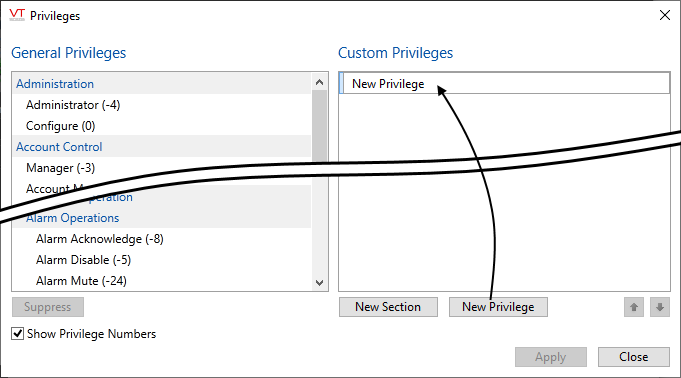
Section of the Privileges dialog with numbers shown.
For instructions to suppress general privileges, see Suppress or Reveal Privileges
- Replace the default name with one that is appropriate for the privilege's purpose.
- Press the Enter key to save the new privilege name.
- You may repeat these steps for as many new privileges as required.
- Click the Apply button when done before closing the dialog.
Privileges are not granted automatically to any user account, including your own.
New section
Create named dividers within your list of custom privileges. This can be helpful for organizing privileges by purpose so that they are easier to find. The structure you create will also be used in the Add Privileges dialog when granting privileges to accounts or roles.
Privileges and sections can be reorganized using the up / down arrows at the bottom right of the list.
Sections can be indented so that they appear as sub-sections, using the left / right arrows
on the selected section.
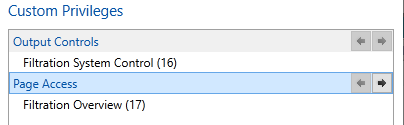
Two custom privileges, each in its own section.
Rename or delete privileges
You can rename a custom privilege by double-clicking on it within the Privileges dialog (or by selecting it and clicking the pencil icon) to open the editing field, then typing over the old name. Because applications privileges are tied to tags, pages and accounts by an identifying number, changing the name has no other effect.
There is no delete button for the list of privileges. If one becomes obsolete, rename it and use it for a new purpose, or rename it to "unused".
Troubleshooting:
- Difficulty entering the new privilege name.
Ensure that you click within the name entry field before starting to type, and press <Enter> or <tab> after typing the name.
