Tag Selector Dialog
The Tag Selector is used by the Historical Data Viewer (HDV) and SQL View Tag. Its purpose is described by its name: to select a group of tags for use with any of these data viewing tools.
The top half of this tool holds the Tag Selection list, showing all the tags available for selection. This list can be shortened by filters that you choose to apply. The lower half shows the Selected tags or Queries. While it is common to select individual tags, don't overlook the flexibility that a query provides. These build in flexibility by automatically including tags created later that also match the saved filter.
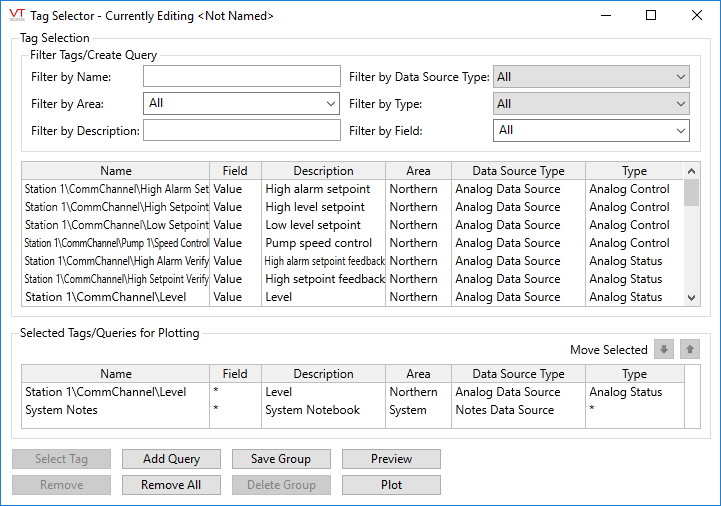
Typical Tag Selector.
Save Group, Delete Group and Plot are shown only when opened from the HDV.
Add individual tags
Tags shown in the Tag Selection list can be added to the Selected Tags list by either of two methods:
- Double-click on a tag to add it to the list
- Click once on the tag, then once on the Select Tag button near the bottom of the dialog.
Tags can be removed from the Tag Selection list either one at a time or all at once. To remove everything from the list of Selected Tags, click the Remove All button.
To remove a single tag or query from the selection:
- If the tag selector dialog is not open, click the Tag Selector button to open it.
- Select the tag to be removed from the Selected Tags list (see image).
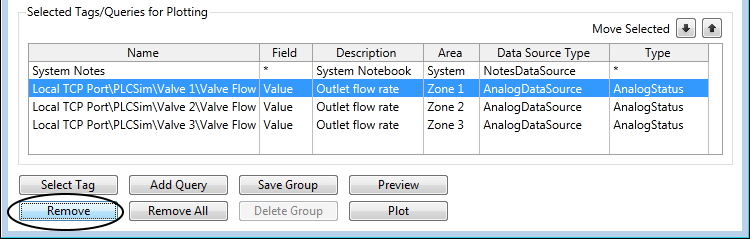
- Remove it by either double-clicking on the tag, or clicking on the Remove button.
- [Optional] If working with an HDV group, click, Save Group.
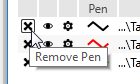
For the Historical Data Viewer only:
Removing a pen from the HDV display (as opposed to the Tag Selection List) does not affect a saved group.