
Used by: I/O and Calculations, Alarm tag, Alarm Status tag, Analog Control tag, Analog Input tag, Analog Output tag, Analog Status tag, Calculation tag, Comm Link Sequencer tag, Counter tag, Deadband Control tag, Digital Control tag, Digital Input tag, Digital Output tag, Digital Status tag, Function tag, History Statistics tag, Modem tag, Network Status tag, Pump Status tag, Rate of Change tag, Script tag, Selector Switch tag, SMS Appliance tag, SQL Logger tag, Totalizer tag, Trigger tag.
* Does not use the Style Settings tag.
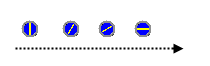
The Animated Image widget is used to display a short movie that runs while the tag’s value is non-zero. When used for tags that have analog values, the speed of the animation reflects the value of the tag. For tags with simple on or off values (digitals) the animation either runs or not. In all cases, you can set the maximum speed of the animation in frames per second when configuring the widget.
A configured Animated Image (shown in multiple frames).
Notes:
* Modern High-Performance HMI user interfaces generally do not include animated images. Before using, ask whether this widget will improve the operator interface or if the goal is merely aesthetics.
* Animated Images do not use animated GIF files or other single-file animations.
* For those doing development over a VIC thin client, note that it is not possible to select alternate images for your animation in this environment.
* You should NOT use the Animated Image or the Color Blink widgets on pages that will be accessed via a VTScada Thin Client Server, due to possible latency and bandwidth issues. If you must use Animated Image widgets, please ensure that you set the frames per second rate low.
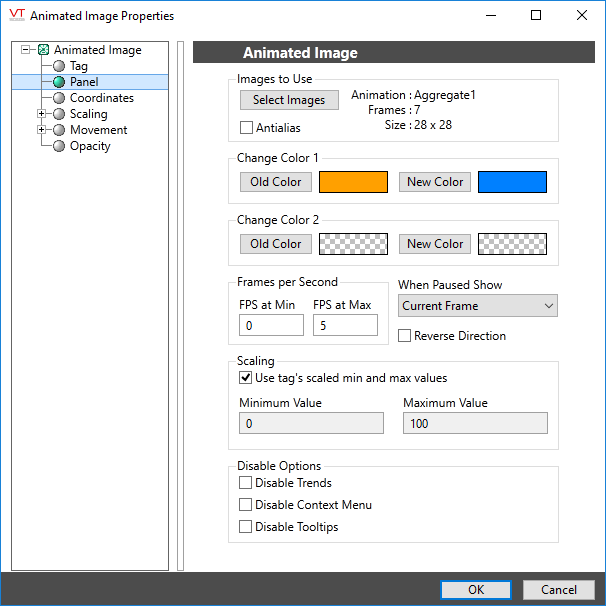
The Animated Image properties dialog will look like the following:
Tag
The Tag field displays the name and description of the tag that is linked to this widget. You can use this to select a different tag or parameter to use as the data source for this widget.
Select Images
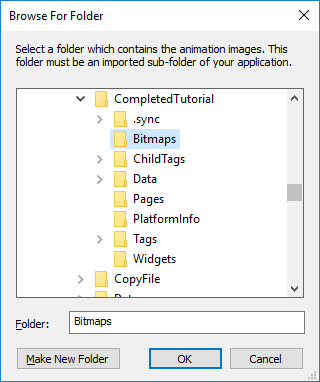
Opens the Browse for Folder dialog, which you can use to select any folder containing a custom animation. The folder must be within your application's folder structure. Use this option to select a custom animation, not to a different VTScada animation to another.
The folder and its files must have previously been imported into your application. Refer to the topic, Adding Custom Animations.
Old Color (1 and 2)
Used in conjunction with the New Color button. Select a color that will be replaced with another in the image. You may replace up to 2 colors.
For example, several of the provided animations have been created with active orange (RGB 255, 160, 0) so that they may be overlaid with a Color Change widget to dynamically adjust their color. You might wish instead to use blue for the image. To do this, select 255, 260, 0 (Active Orange) as the old color and blue as the new.
The tool used to choose a color is the Select Color Dialog.
New Color (1 and 2)
Used in combination with the Old Color button. Select a new color to replace another in the image. You may replace up to 2 colors.
FPS at Minimum and at Maximum
Use these fields to set the minimum and maximum animation speeds relative to the associated tag’s scaled minimum and maximum values. The animation speed is measured in frames per second (FPS). The values you set here must be within the range of 0 to 30, but there is a way to override these by applying your own minimum and maximum scaling
The default minimum value is 0, indicating that the animation should be stopped when the value of the associated tag is at its minimum. The default maximum is 15, which generally provides an acceptable animation without excessively taxing either your computer’s CPU or display card.
Reverse Direction of Animation
Select this option to run the animation from the last frame to the first frame, rather than from the first frame to the last frame, thereby reversing the apparent direction.
When Paused Show
Select which frame you wish the Animated Image object to show when it is paused. This can be one of:
- Current Frame: The frame of the animation that last played will be displayed when the animation is paused.
- First Frame: The first frame of the animation will be displayed when the animation is paused.
- No Image: No image will be displayed when the animation is paused.
Use Tag's Scaled Min and Max Values
Selected by default. Indicates that the tag’s minimum and maximum scaled process values should be used. If you deselect this box, then you may enter your own scaling values for the tag by using the Minimum Value and Maximum Value fields (see following). These values will only apply to this one animation of the tag.
The net effect of scaling, and therefore the speed at which the animation will run, will depend on the relationship between the tag’s scaling values and those that you set here.
For example, given the following:
- A tag with scaled values from 0 to 100.
- A FPS rate at minimum of 0.
- A FPS rate at maximum of 30.
Setting your own Minimum and Maximum scale values will change the FPS rates as follows:
- Minimum set to 0 and Maximum set to 50: FPS at minimum is 0 and at maximum is 60.
- Minimum set to 0 and Maximum set to 200: FPS at minimum is 0 and at maximum is 15.
- Minimum set to -100 and Maximum set to 100: FPS at minimum is 15 and at maximum is 30.
- Minimum set to 50 and Maximum set to 100: FPS at minimum is -15 and at maximum is 30.
Minimum Value and Maximum Value
These two fields are enabled only when the Use Tag’s Scaled Min and Max Values check box is not selected. See Use Tag’s Scaled Min and Max Values for a full explanation of the effect of these values.
Disable Options
Disable selected operator-interaction features of this widget.
See: Operator Interaction Controls
Basic Components\Animations\
