Report Studio Tools
The Report Studio is still under development and has not officially been released. Be warned that code may change such that reports you create with this pre-release trial version might need to be updated in order to continue working after your next VTScada update.
Until the official release, documentation for the Report Studio will open in response to the F1 key but will not be shown in the menu system. To view a table of contents for the complete chapter, navigate to The Report Studio
Tools in the report studio are listed here. Descriptions and instructions can be found in the following topics.

Sample Report Studio
Tools
Undo / Redo
The result of a Report Studio editing session is stored in the VTScada Version Control system. Steps within an editing session are not. Use these buttons to back up while editing a report.
Clipboard - Copy / Paste
Reuse elements within a report. Pasted copies are always added to the end of the report and can be moved as required from there.
Save / Clone
As labeled.
Parameters - Manage / Values
Use "Manage" to create and edit parameters that allow you to (for example) use the same report for any selected station. Use "Values" to select (again, for example) the station to use while building and previewing the report.
Preview
Run a sample report to check your work so far.
Use the Title button to change the title of the report or click the Settings button to open a settings dialog.
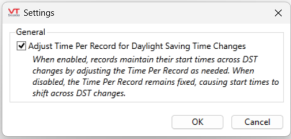
Adjust Time Per Record for Daylight Saving Time Changes - Enabled by default. Any records occurring during Daylight Savings Time are adjusted to compensate for the lost or added hour.
Should you disable this setting?
Enabled: timestamps are adjusted. Consistent timestamps are more important than the duration of each record.
Disabled: Timestamps are not adjusted. Consistent duration for each record is more important.
For example, Batch Process applications may wish to disable this setting if duration is more important than timestamp.
Delete
Remove the report.
Components Palette
Drag components from the palette to the canvas. When a component is selected in the canvas area it's properties are available for editing in the right-most panel. Tables are always centered within the report body. Decorative components can be left-, right-, or center-justified relative to tables.
Image
Add a logo or other image to your report. See: Report Visual Design
Line Chart
Add a line chart to your report, showing all the pens in a tag query.
Spacer
No space is left between report elements other than what you define using spacers. See: Report Visual Design
Table
Tables define the body of most reports. See: Tables: Appearance and Data AggregationSee Also
Text
Add a title, explanation, or other notes to the report. See: Report Visual Design
Add tag values (at the time the report is generated) to a text component. See: Use Your Parameters in Report Text
Data Set Manager
See and manage Data Sets that have been created in a report. If you drag a Table component onto the canvas, two Data Sets are generated and will appear in the manager. (Row Labels and Timestamps). Any Data Set you add through the properties panels of other components will all appear in the Data Set Manager.
Select a Data Set from the Data Set manager to see Data Set properties. From the Data Set Properties panel, you can rename a Data Set.
Add a new Data Set from the Data Set Manager by clicking the [+] in the bottom-left corner. A pop-up dialog will appear asking for a Name and a Type from a droplist of options.
The name cannot be left blank. You cannot have duplicates-- you may not use the same name as another Data Set in the same report.
Copy
Copy an existing Data Set with a new name. This tool is handy for quickly generating Data Sets with slight modifications. A dialog will appear so you can modify the name of the Data Set. The Type droplist will be disabled.
Delete
Click on a Data Set in the Data Set Manager and then click the nearby trash can. A dialog will pop up with a warning, "This Data Set may be in use by components or other Data Sets. Are you sure you want to delete the selected Data Set?" Select Delete to remove the Data Set from the report, or cancel to close the dialog without changes to the report.
